Highly Available Web Application
Overview:
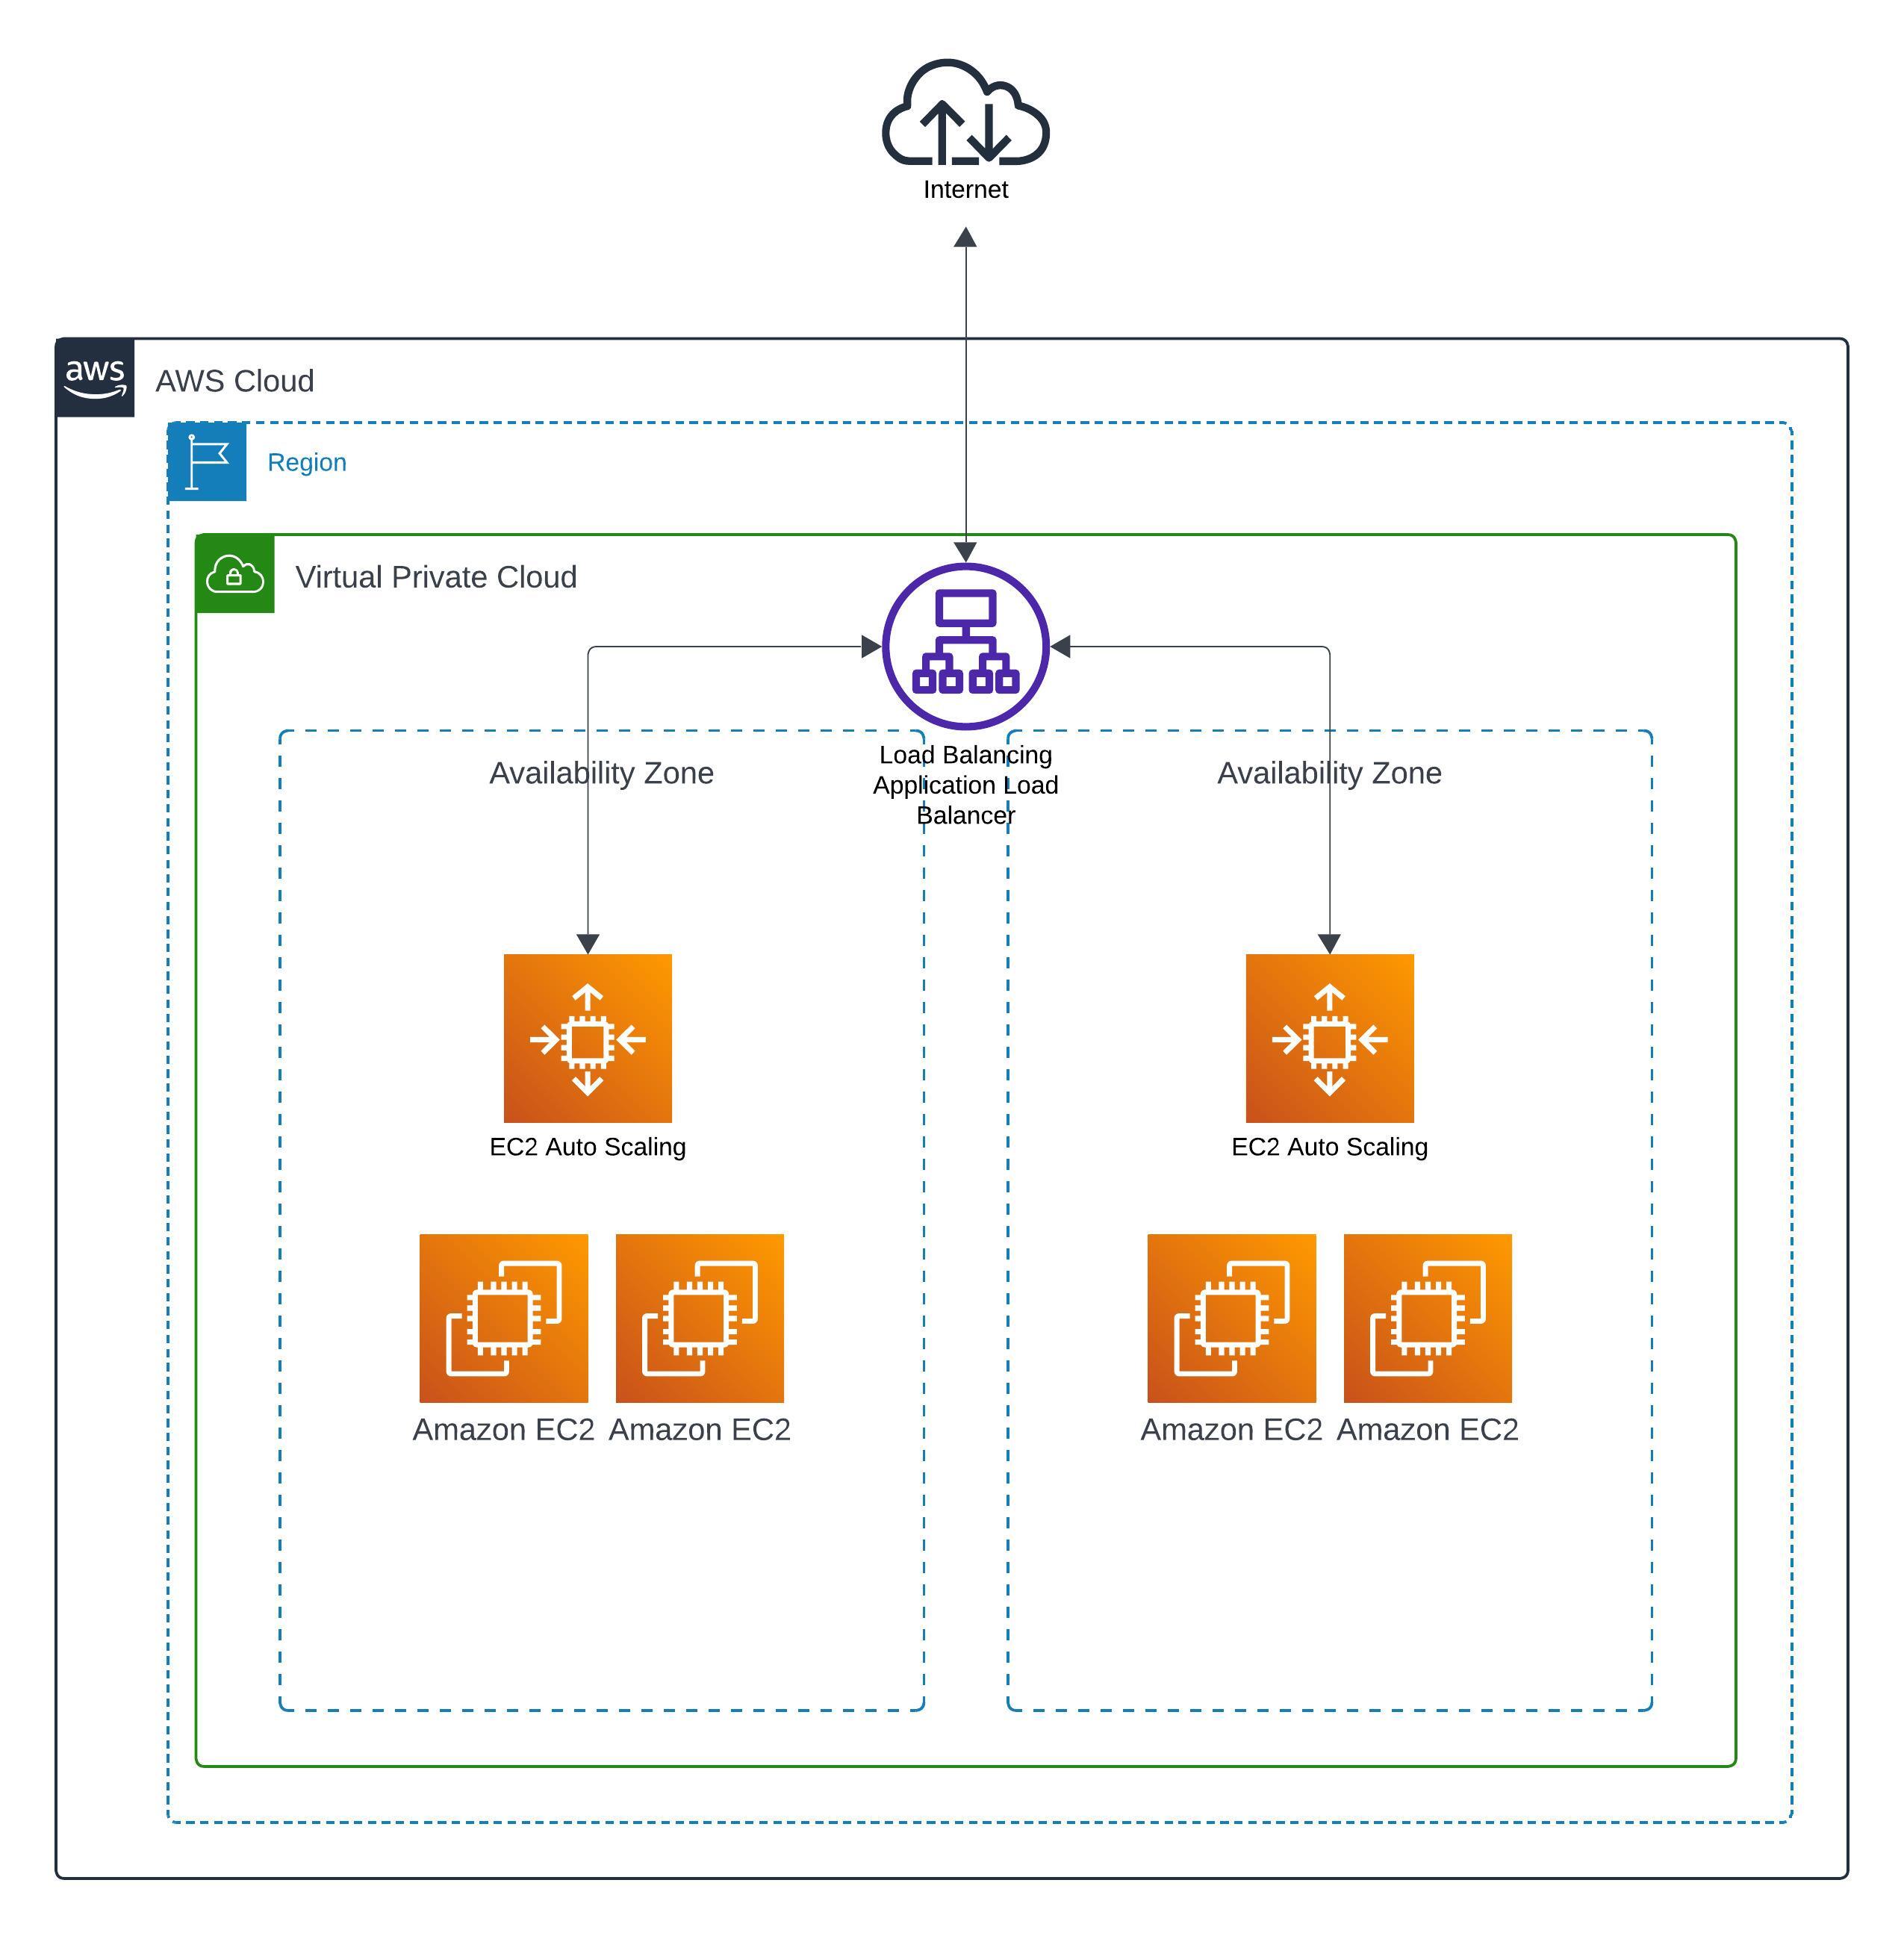
This project involved building a basic web application with a robust and scalable architecture. The application was developed as a test for e92plus (my former employer) who required a reliable blog site that can handle peak traffic. The company intended to release weekly articles which would be opened by hundreds of people from their laptops on the browser, high availability & failover were priorities in the event of a component failure or high traffic demands. A test application was deployed on AWS using an NGINX web server, the following services were used:
-
EC2 Instances
For hosting the web application
-
Elastic Load Balancer
To distribute incoming traffic across multiple EC2 instances to ensure even load distribution
-
Auto Scaling Group
To automatically scale the number of instances up or down based on demand, maintain health, availability of the application and optimize cost.
-
CloudWatch
To set up monitoring and alerts once CPU utilization reaches a certain threshold
Deployment steps
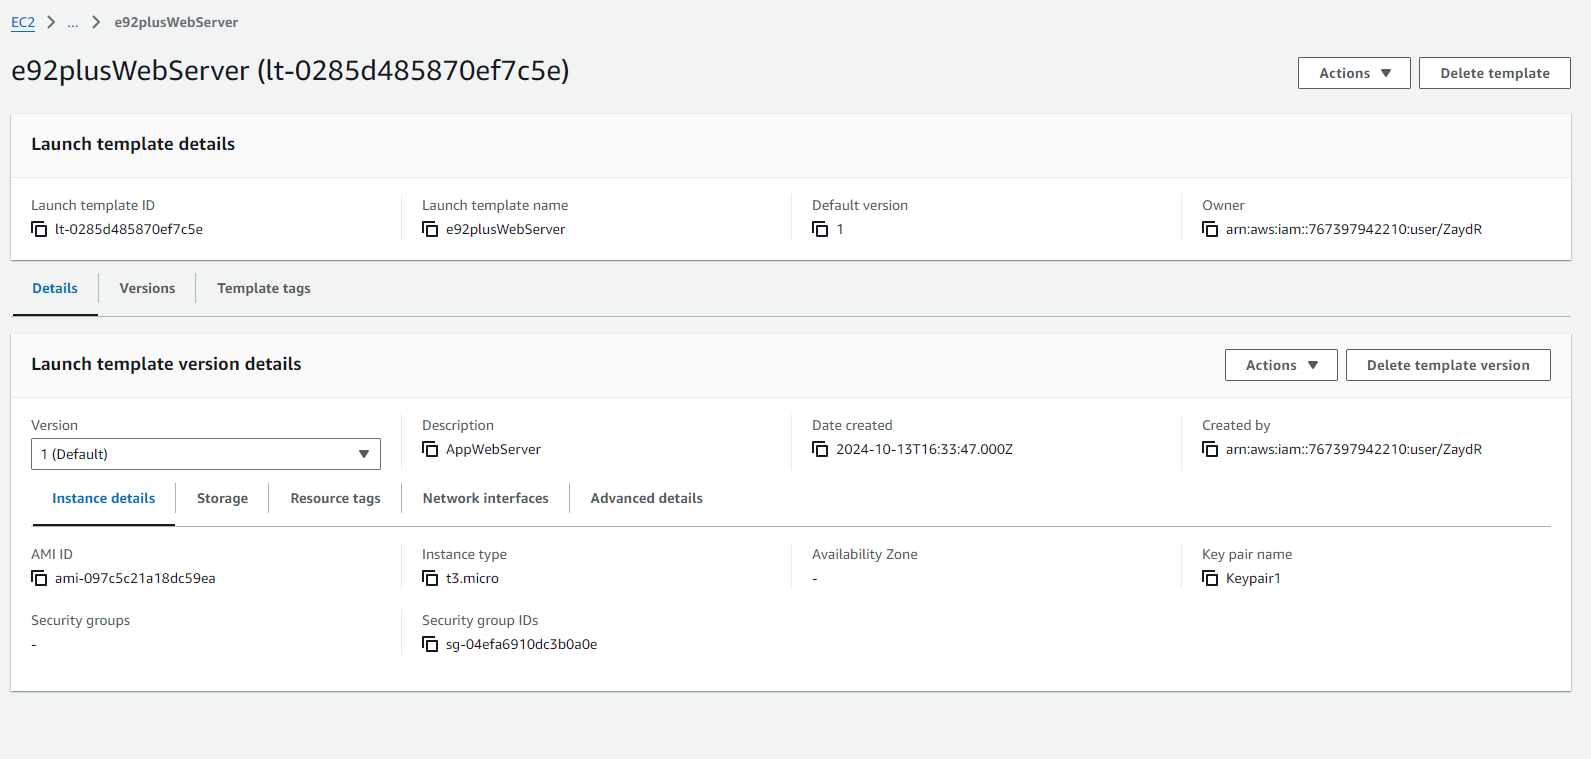
1. Create a Launch template
-
EC2 launch template was configured with a Amazon Linux 2023 AMI, T3 micro instance and a key pair.
-
I used the launch template to set up NGINX as it ensures that every instance is configured consistently, which is crucial for scaling and load balancing.
-
Configured the security group to allow inbound HTTP (port 80) and SSH (port 22) traffic from the load balancer.
-
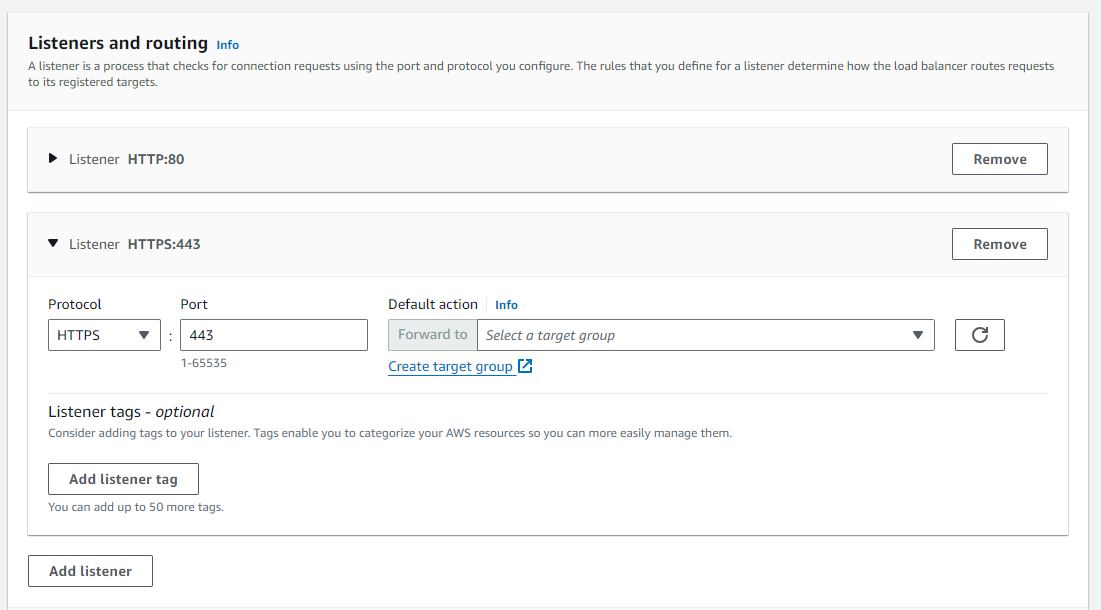
I created a security group for the load balancer to allow incoming HTTP/HTTPS traffic from the internet.
-
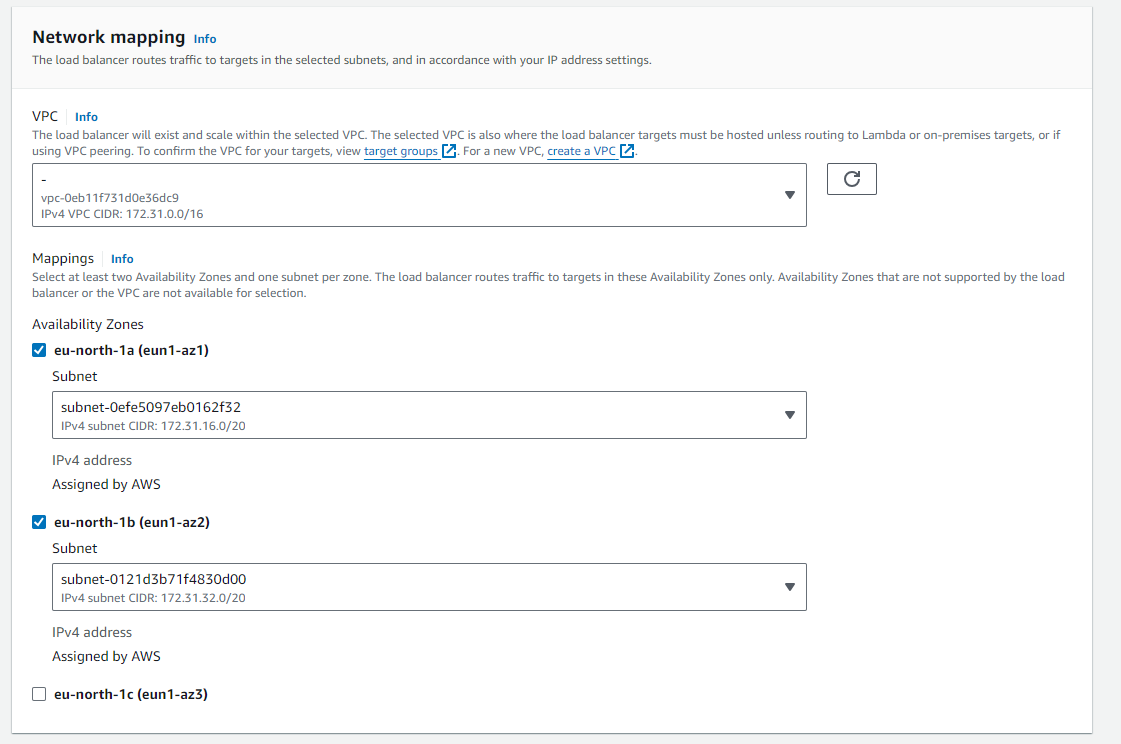
ALB created for HTTP/HTTPS traffic
-
Configured the load balancer to forward traffic to the Auto scaling group instances.
-
Health checks were set up to monitor instance health and ensure that only healthy instances receive traffic.
-
Two Availability zones selected for high availability and fault tolerance.
-
An auto scaling group was created using the launch template
-
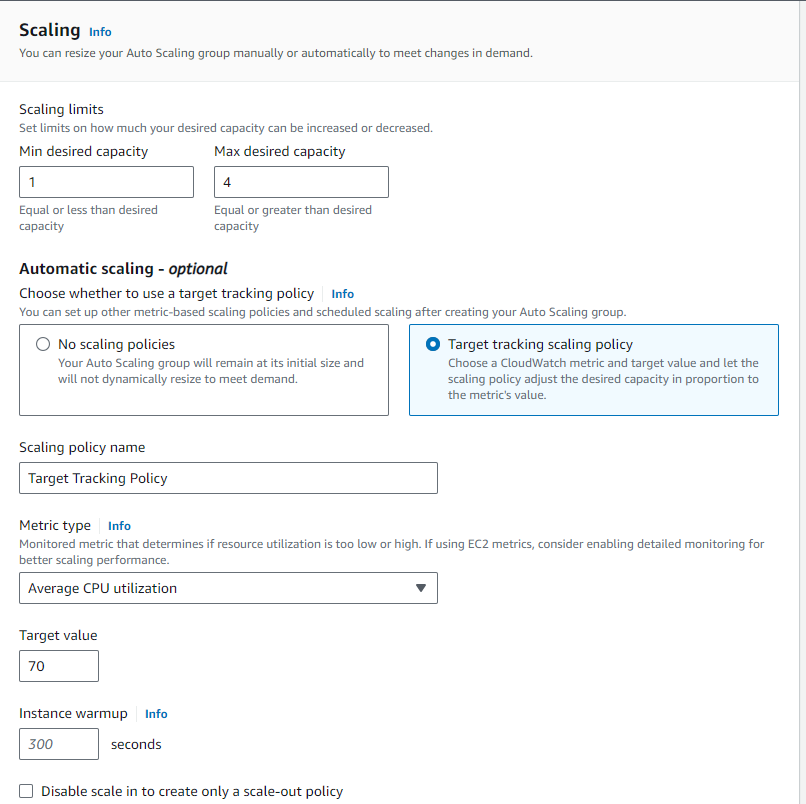
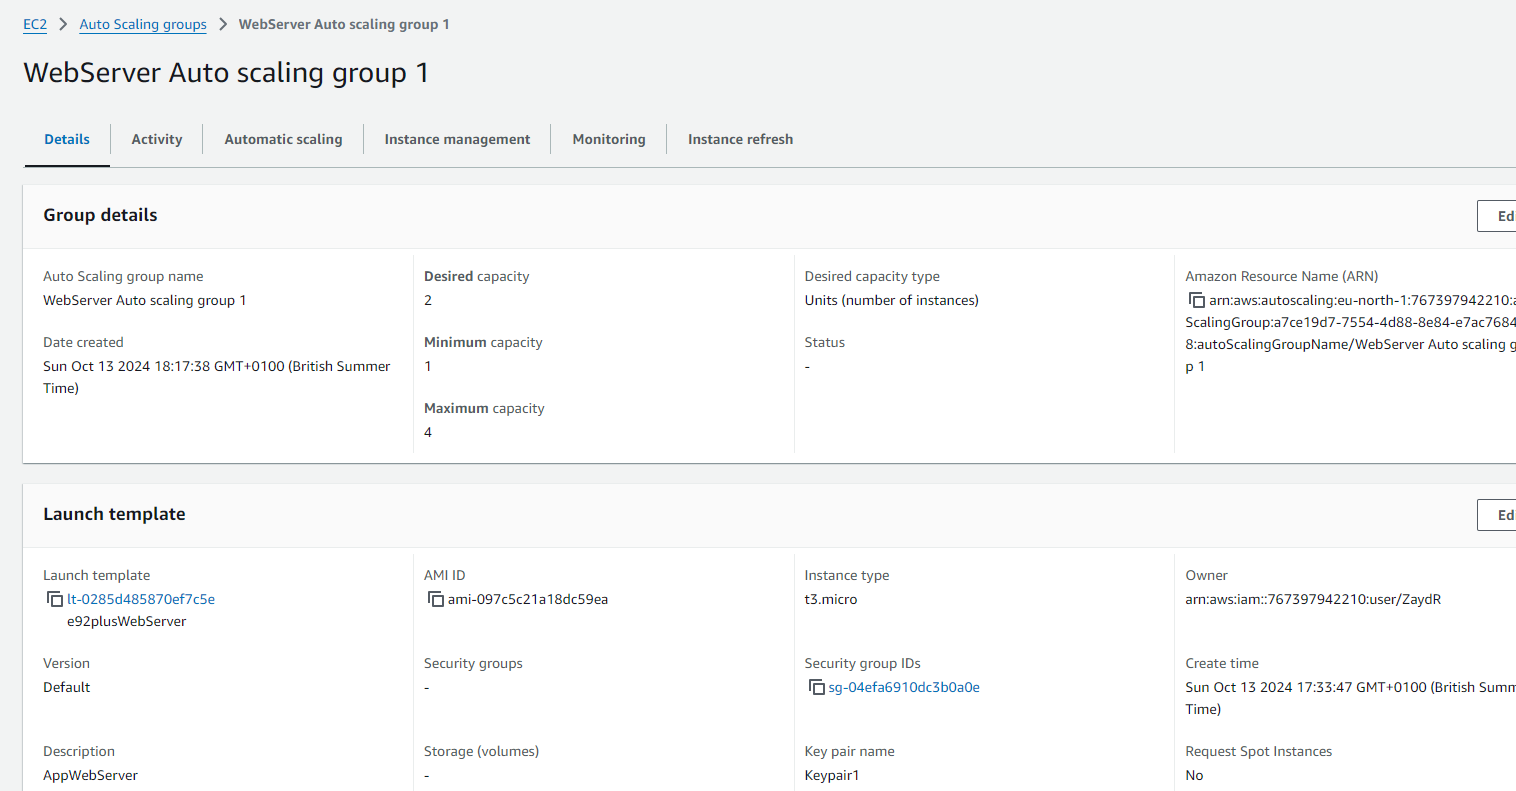
Set desired capacity - 2, minimum - 1, maximum - 4
-
Scaling policy defined on CPU utilization - scales out at 70% and scales in when CPU is below 30%
-
Deployed the web application to the EC2 instances, this was accessed through the Load Balancer's public DNS
-
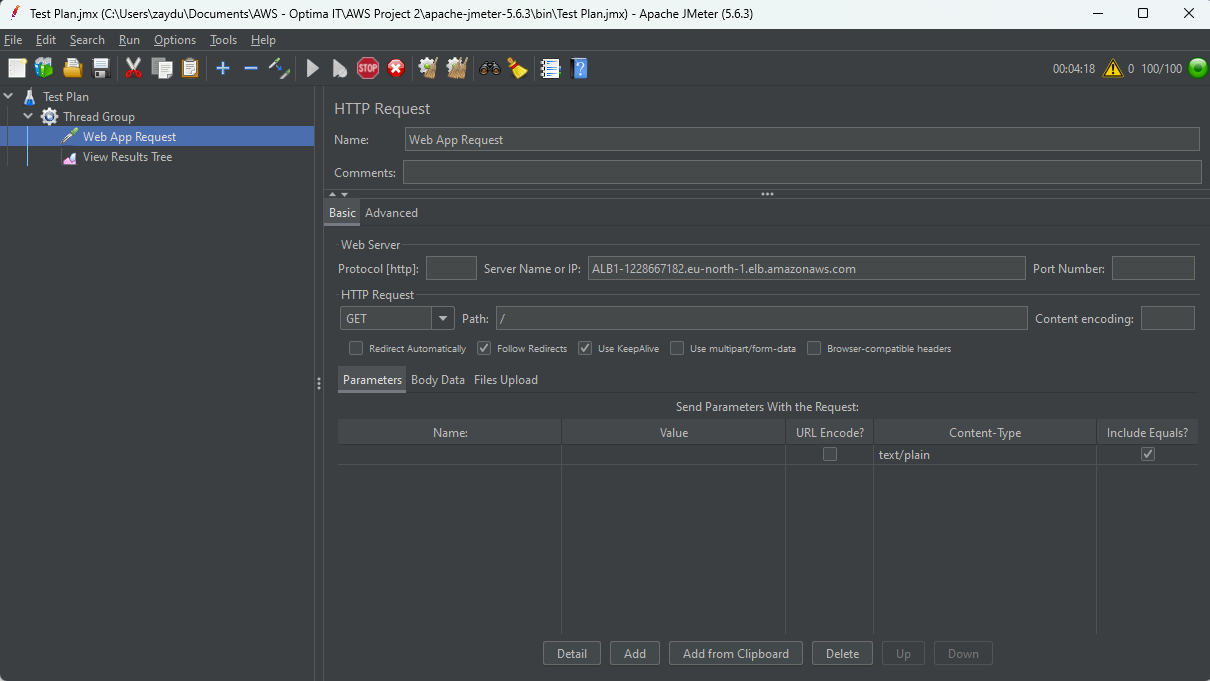
Simulated using Apache Jmeter with 100 users to test auto scaling in action
-
I used CloudWatch to monitor metrics such as CPU utilization and memory usage.
-
Set up CloudWatch alarms to notify me if metrics cross certain thresholds
-
The system was designed to have no single point of failure which was achieved via load balancing.
-
Multiple availability zones enabled EC2 high availability, which would route traffic to an operational AZ in the event of an outage.
-
Auto scaling allows the system to automatically increase the number of instances to meet high traffic demands and save money by stopping the instances that are no longer needed
Installed NGINX using the following script to automatically install and configure the web server. This was entered in the 'Advanced details' section under User data when creating the launch template.
2. Security Group configuration
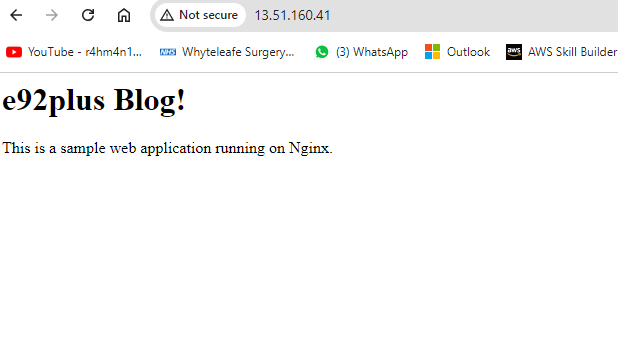
Tested the launch template configuration by launching an instance, then opening the public IP address. I hosted a sample web application on NGINX, tested with a simple HTML file.
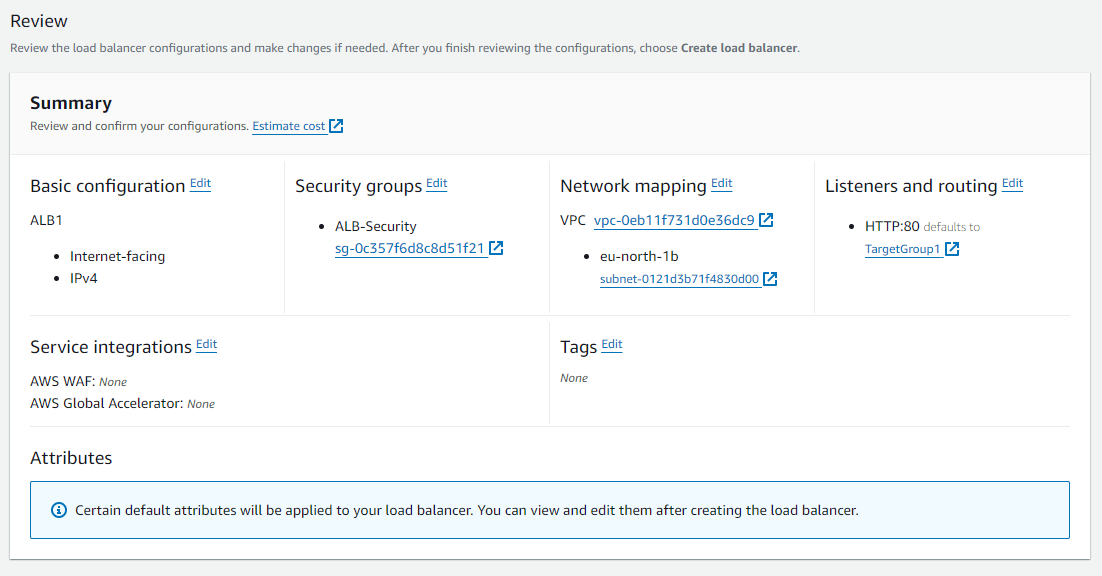
3. Configure the application load balancer and add the ALB1 security group
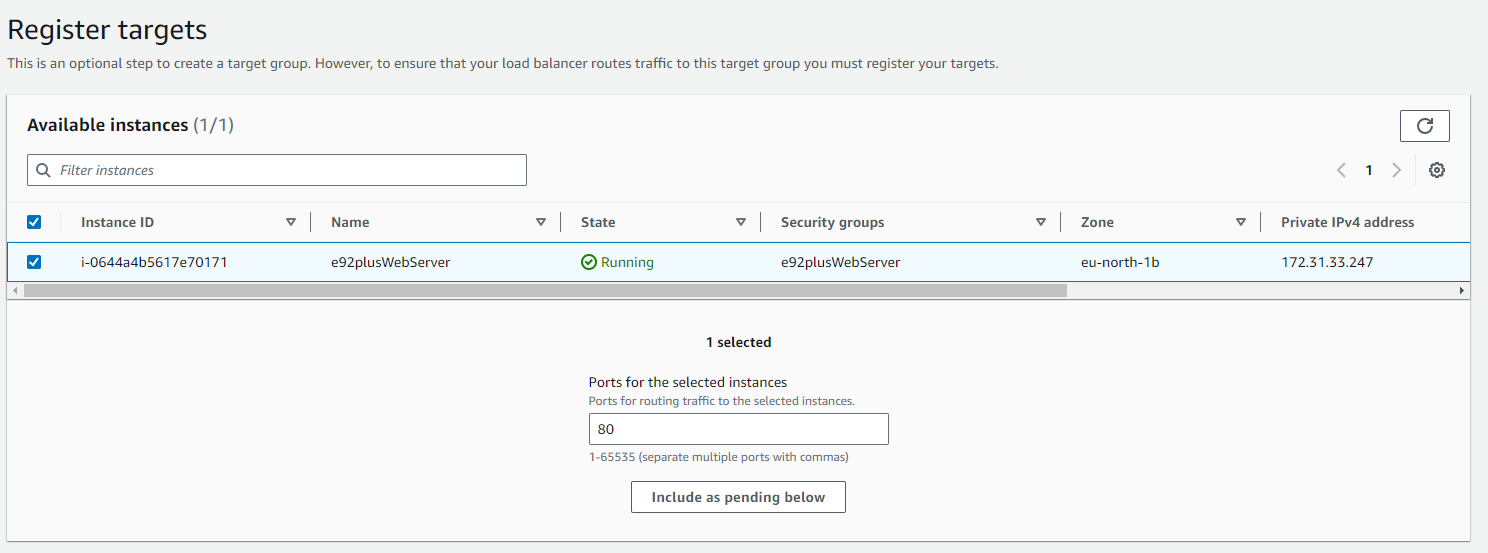
Selecting the EC2 instance for the load balancer to distribute traffic to,
Application Load Balancer details:
Tested to show that traffic is distributed evenly to healthy EC2 instances
4. Set up autoscaling (ASG):
ASG details
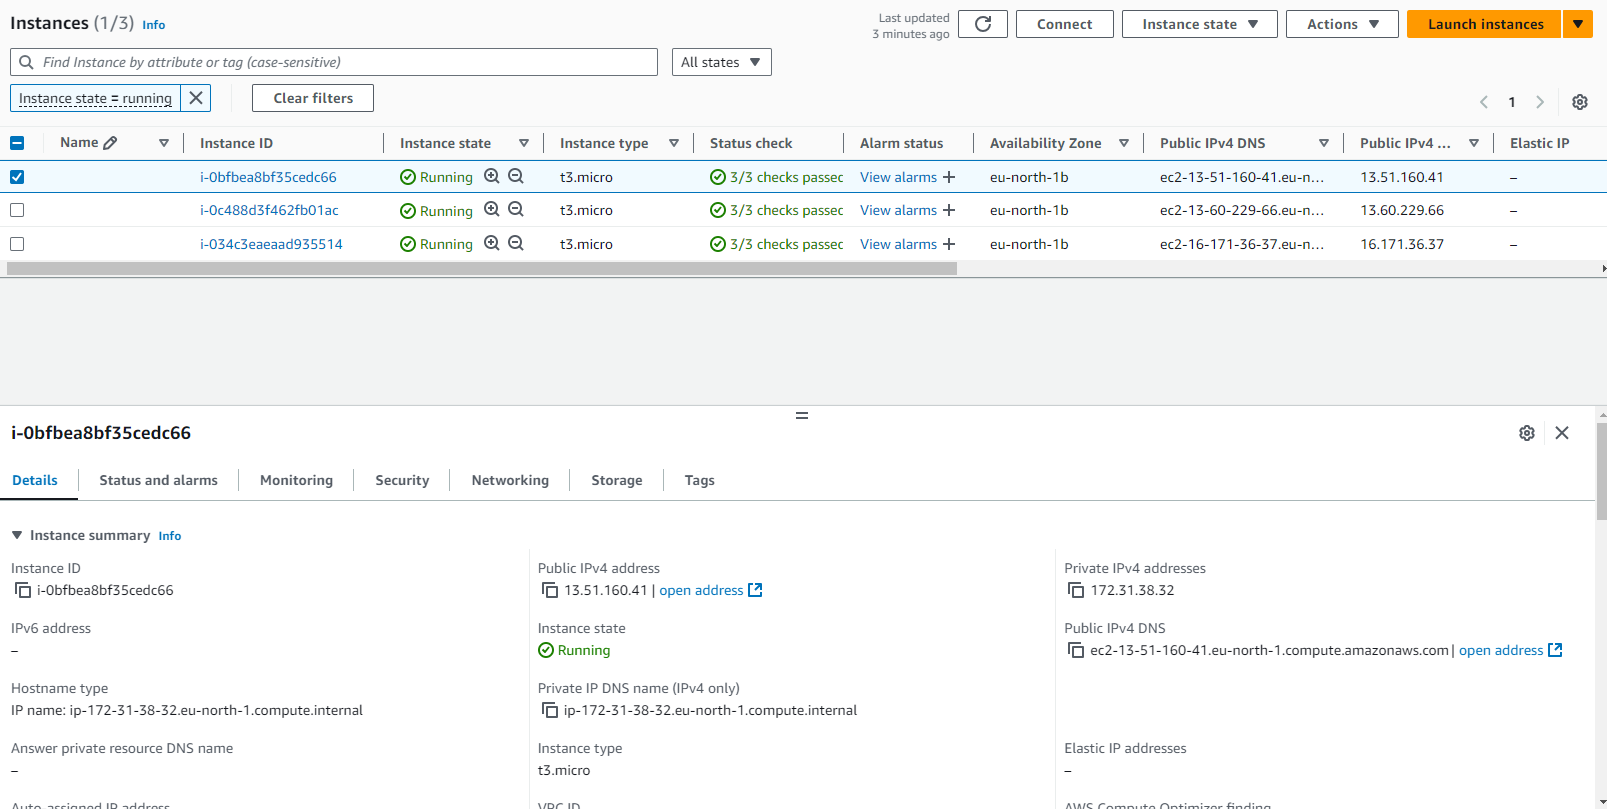
5. Test auto scaling by simulating traffic
Instances were automatically launched based on the defined scaling policy
6. Implement Monitoring and Alerts
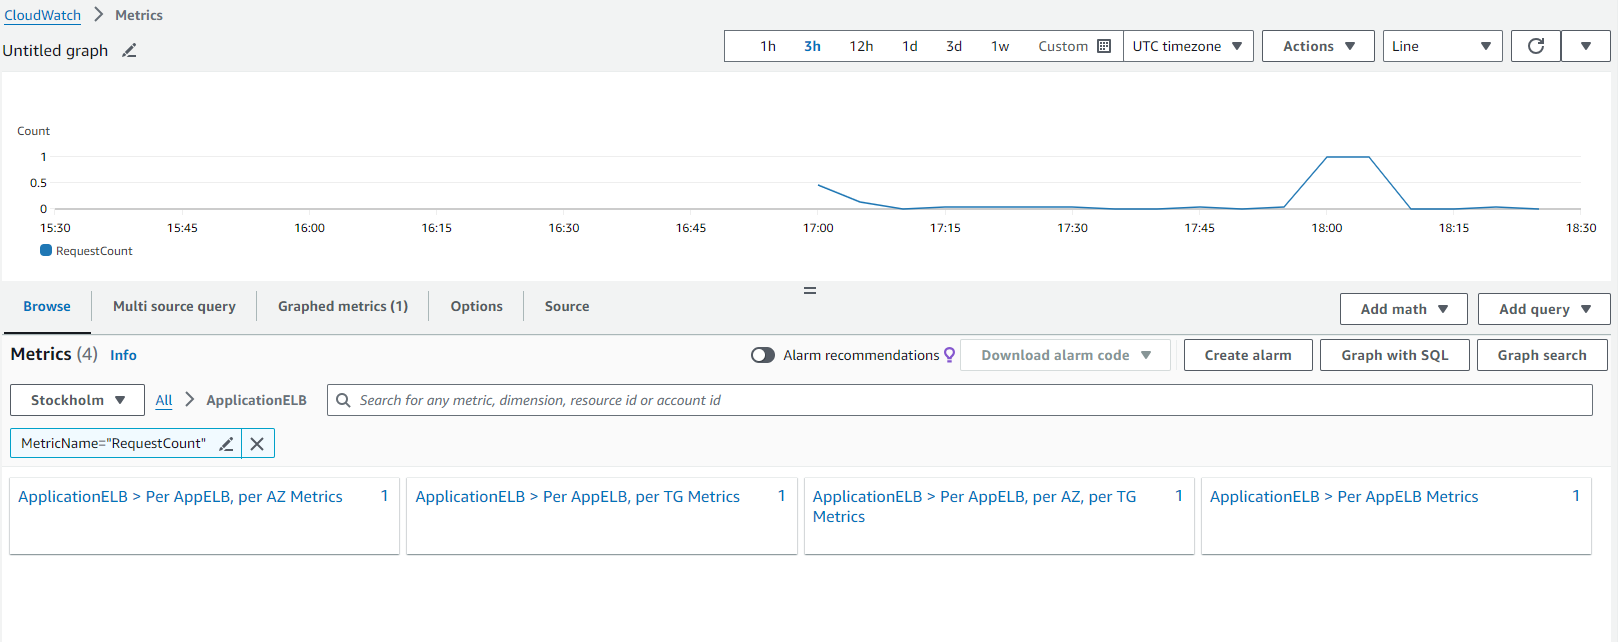
Cloudwatch metrics:
The 'Request Count' metric shows the number of requests handled by the load balancer, as you can see in the spike when the test was initiated at 18.00 for 5 mins
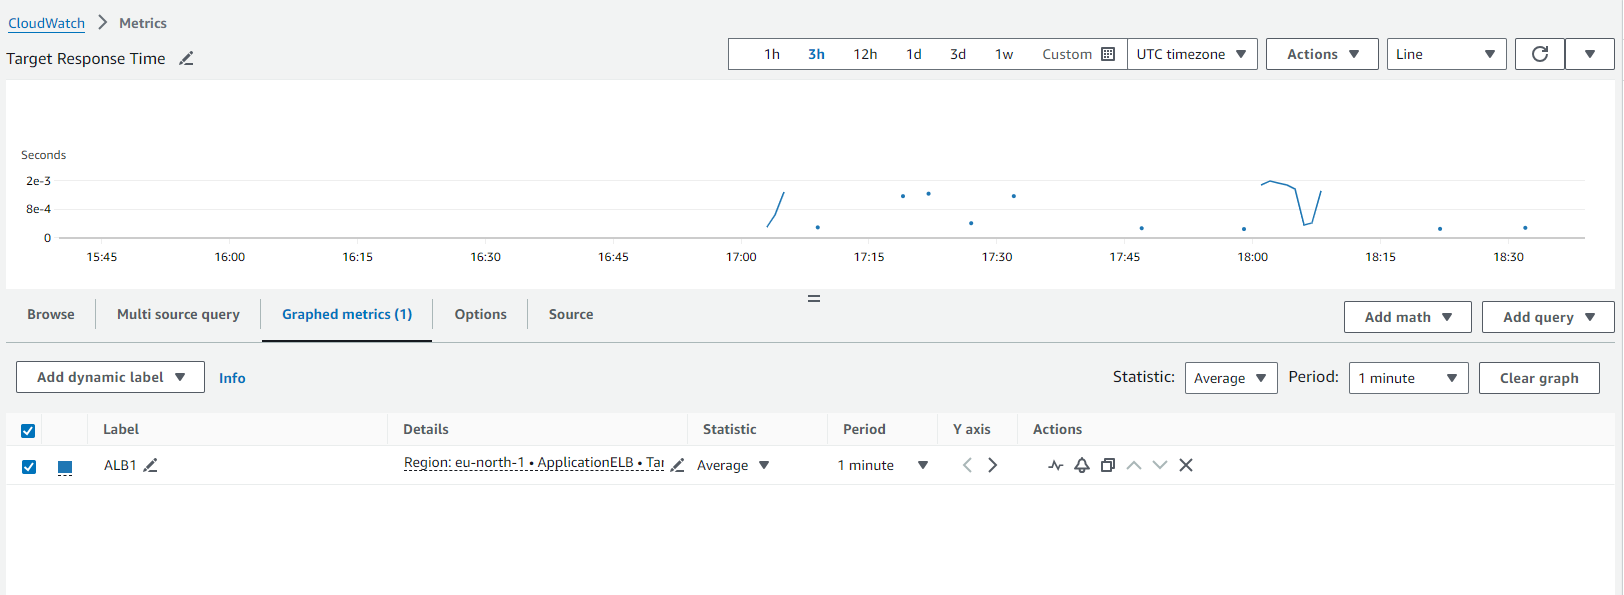
Target Response Time metric shown here from 18.00, it presents an increase that indicates a higher load on the servers.
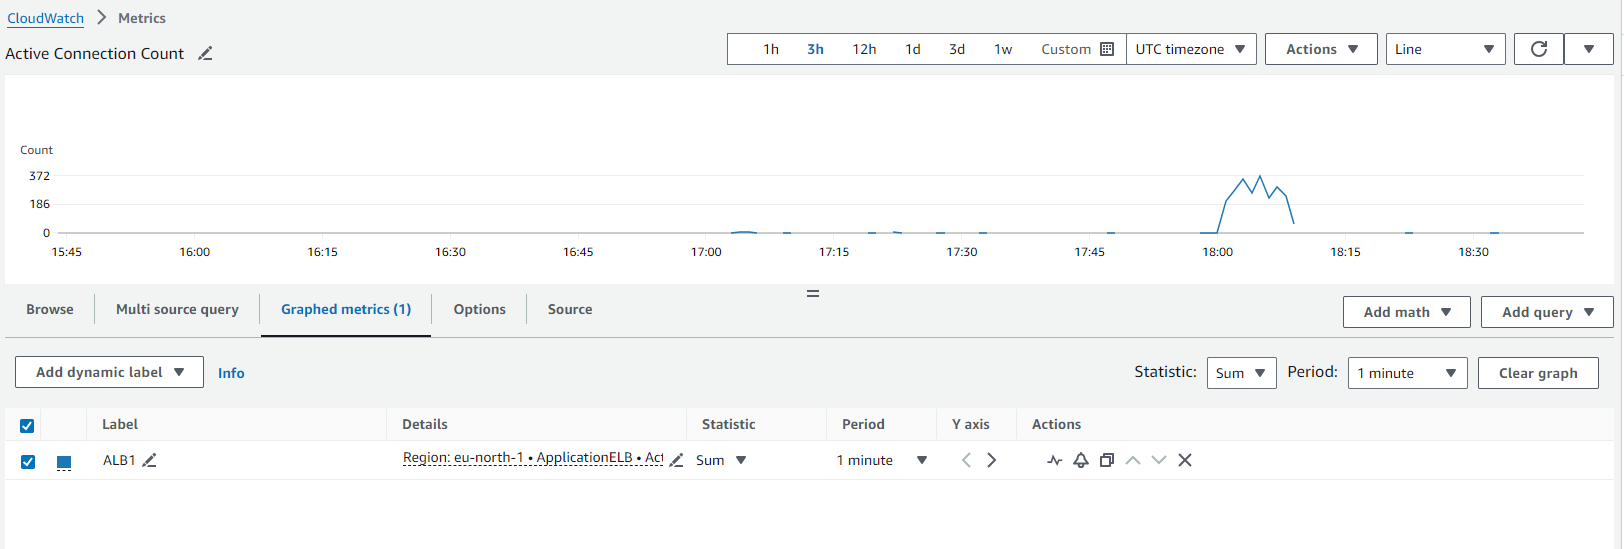
Active connection count shows that the load balancer is handling many simultaneous requests starting from 18.00
Project outcomes
